Robert M. Layng is a Machinist/Technician for the Engineering Division at Lafayette College in Easton, Pennsylvania. He has been in machine shops since his high school vocational school years. A 2008 graduate of the Toolmaking Technology program at Pennsylvania College of Technology in Williamsport, he specializes in prototyping and practical design. Robert has been a contributing author for American Gunsmith magazine.
Robert also hosts the new weekly podcast, “The Daily Grind” by Cutting Tool Engineering Magazine, live Monday mornings at 8 am Eastern, uploaded to major streaming platforms on Tuesday morning. He also contributes regularly to the magazine. The Daily Grind podcast can be found at CTE's website, YouTube, Spotify, and Apple Podcasts:
Here’s an overview of how I built a “21st Century fix” for disassembling smaller 1911 handguns and those with bull barrels and no bushings for cleaning or maintenance.
Thanks for reading! Subscribe for free to receive new posts and support my work.
by R. M. Layng
An interesting project came across my bench a short time back involving the smaller size of 1911 family of pistols, specifically those with bull barrels and no conventional bushings in the front that need to be rotated out of the way for the recoil spring to be removed.
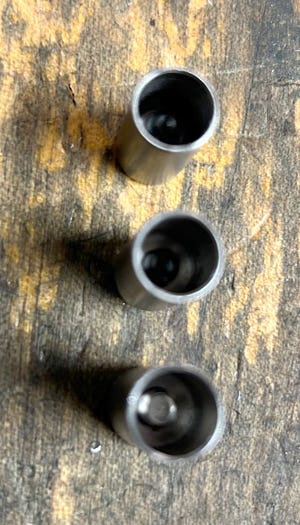
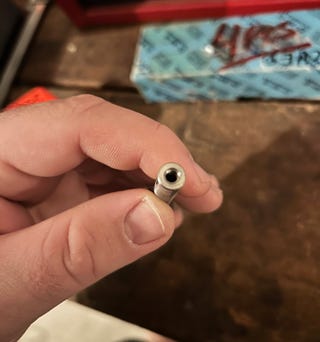
The business end of all three pieces. All three are identical on this end with the same depth of pocket and same length of threads protruding from the wall.
To those of us that either have or have worked on one of these smaller size pistols we know the difficulty that can arise when needing to field strip one of these little monsters. You need to retract the slide a ways, insert a cross pin into that tiny hole in the recoil guide rod, gently let the slide forward and then off the frame to be able to remove the recoil assembly, and then the barrel. I used to resort to a tiny 1/32” hex wrench that was ground off to just the perfect length to facilitate the disassembly. Fishing that out of the slide when taken apart, and then fishing it back in through the reverse recoil spring plug was a pain - albeit a small one, pun intended.
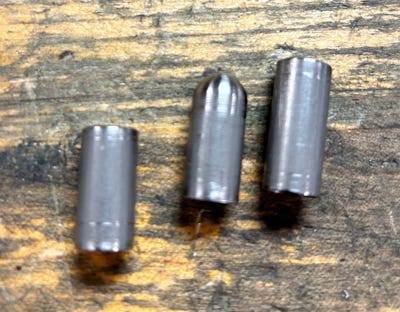
Side view of all three prototypes showing the differing lengths and shapes employed to assist in taking down the pistol.
After much thought and speaking with the pistol’s owner (longtime family neighbor Robert W. Clark), along with a few other machinist friends, a preliminary design was cooked up. The thought process revolved around finding a part of the recoil assembly that would not affect cycling should it be slightly modified. It was decided that I would drill and tap a hole at the end of the recoil guide rod for an 8-32 thread. The guide rods on both of the pistols I measured were 5/16”, plus or minus a few thousandths. Using this as a basis for the tool, I decided to drill the interior of the new takedown tool to 21/64”, allowing for any inconsistency in the threading of the guide rod, the stud in the tool itself, etc. I had 3/8” stainless steel drill rod on hand, left over from another job. This size of material fit perfectly into the pocket holding the reverse plug and still pressed against the plug, all while still allowing the slide to travel over it to allow disassembly. Jackpot!
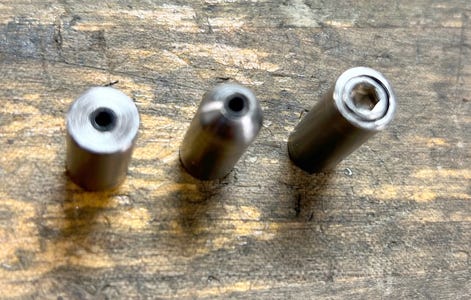
The outside end of the prototypes and the different screw styles and geometries of each one.
Next was finding the length I needed. For this Commander size model, I measured from the end of the guide rod to the furthest end of the hole for a length I would need to successfully depress upon the reverse spring plug and effect the removal of the recoil assembly, in this case 3/8”. I made the pocket 1/2” deep to make sure I would depress the reverse plug far enough. Adding to that a 1/4” wall for the threaded stud to anchor to, giving me 8 screw threads to hold onto and allow me the “meat” to drill through the side for a roll pin to keep the screw from backing out in use. Next, I drilled just shy of the depth as measured with a standard drill, and then ground the cutting edge of another drill bit to cut a flat-bottomed hole, and finished drilling the hole to depth. I then ran a tap drill for an 8-32 thread through the part and threaded that hole for the stud. Just to make sure the stud stays in place, an extra added measure was to stake the stud in my new adapter with the cross-drilled hole and roll pin that I mentioned before. As a side note, I have noticed different manufacturers and models all have different locations of the pin hole on the length of the recoil guide rod so I made appropriate takedown adapters for each of these different models. Should you decide to do something like this, I would suggest using the formula I laid out and just change the depth of your pocket and overall length to account for what you’ve measured for your exact pistol.
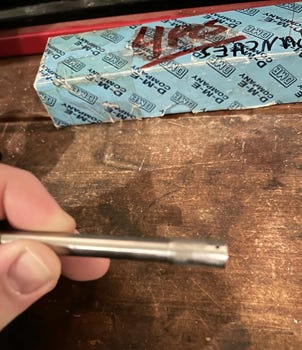
Muzzle end of the guide rod showing the 8-32 threads drilled and tapped in the end. These threads correspond to the studs staked into the three tool bodies.
Not knowing exactly how this would function, being a completely new design for me, I made three prototypes with all three identical in the pocket for the guide rod but slightly different on the outside where the 8-32 screw gets anchored. The first is the shortest, 3/4” in length but a complete cylinder in shape. The next one was slightly longer at 7/8” in length but having a counter bored hole on the opposite end of the pocket to account for a socket head cap screw. Lastly, the third model was also 7/8” in length but the end was rounded off. The thinking behind this was that I’d like to find out which design allowed the guide rod to be removed from the slide once it was taken off of the frame while still keeping the reverse plug and recoil spring compressed.
Thanks for reading! Subscribe for free to receive new posts and support my work.
Next, I clamped on the guide rod in a collet in a lathe. This is a self-centering setup so I don’t need to spend the time dialing it true; a real quick fix to drill and tap the end of the rod. I drilled with a tap drill on the smaller end of the acceptable scale for an 8-32 thread. This was to ensure that the adapter’s stud doesn’t strip the threads of the guide rod under the recoil spring’s pressure, and this also helps retain the set screw that fills the hole when the pistol is fully assembled. Permanently modifying the end of the guide rod like this might not look great when left empty, so I plug the threaded hole with a set screw when the pistol is assembled and ready to fire, but this does not affect the cycling of the pistol while shooting.
One of the prototypes installed on the guide rod. This is how it will compress the recoil spring by pressing on the reverse plug. Notice how it covers the original pin hole in the guide rod, meaning it will compress everything just as designed.
Using this new adapter supplants the use of the cross pin in the tiny hole already in the guide rod. Lock the slide back as normal, remove the set screw, thread on the adapter, and slowly let the slide back down onto this new adapter. Don’t drop the slide by releasing the slide stop as you’ll both shear off the small threads and damage the housing of the tool itself. This compresses the recoil spring under the reverse plug, just as the cross pin would, and allows taking the pistol down in the normal way prescribed in your owner’s manual. Remove the slide lock and run the slide off the frame. Upend the slide and remove the recoil assembly and then slide the barrel out the front of the slide. You can now do your cleaning or maintenance as needed, and then reverse this order to reassemble the pistol, making sure to lock the slide back before removing the adapter. You don’t want the spring pressure to launch the adapter across the room once you’ve run out of threads. Plus, the heavy recoil spring pressure would bind the whole thing up, anyway.
Thanks for reading, and I hope this helps other ‘smiths should they find themselves looking for a modern-day solution to this same age-old problem. A special thanks and point of recognition goes out to Mr. Robert W. Clark whose original conundrum lead to this design going from merely talking about a fix to becoming a fleshed-out prototype. Your input and inspiration helped find a fix to a problem I also face in my Officer’s model. I hope this works for your pistols as well, should you decide to do something similar!
Thanks for reading! Subscribe for free to receive new posts and support my work.


In a bygone era, manufacturers would have included a elegant takedown tool like this with the gun. And an extra magazine or two....